Total Pageviews

Saturday, October 27, 2012

24 Days of Christmas Advent Calendar

In previous years, we've had Advent calendars that included small treats and toys. This year though, I wanted to focus more on experiences, rather than "stuff." With the commercialism of Christmas getting so out of hand, I felt this would be more meaningful (plus it gives me the opportunity to create lists and organize myself a little more!) My 3 year old also has gotten to the "buy me stuff" stage every time we venture to the store...we are breaking that ASAP!

While browsing through my Cricut cartridges one day, I discovered that the George Cartridge could cut envelopes. I used the cricut to cut out 24 small envelopes and stuffed each one with a meaningful experience. Since I babysit two other boys in my home several days a week, I also wanted activities that they could participate in with minimal cost to me.


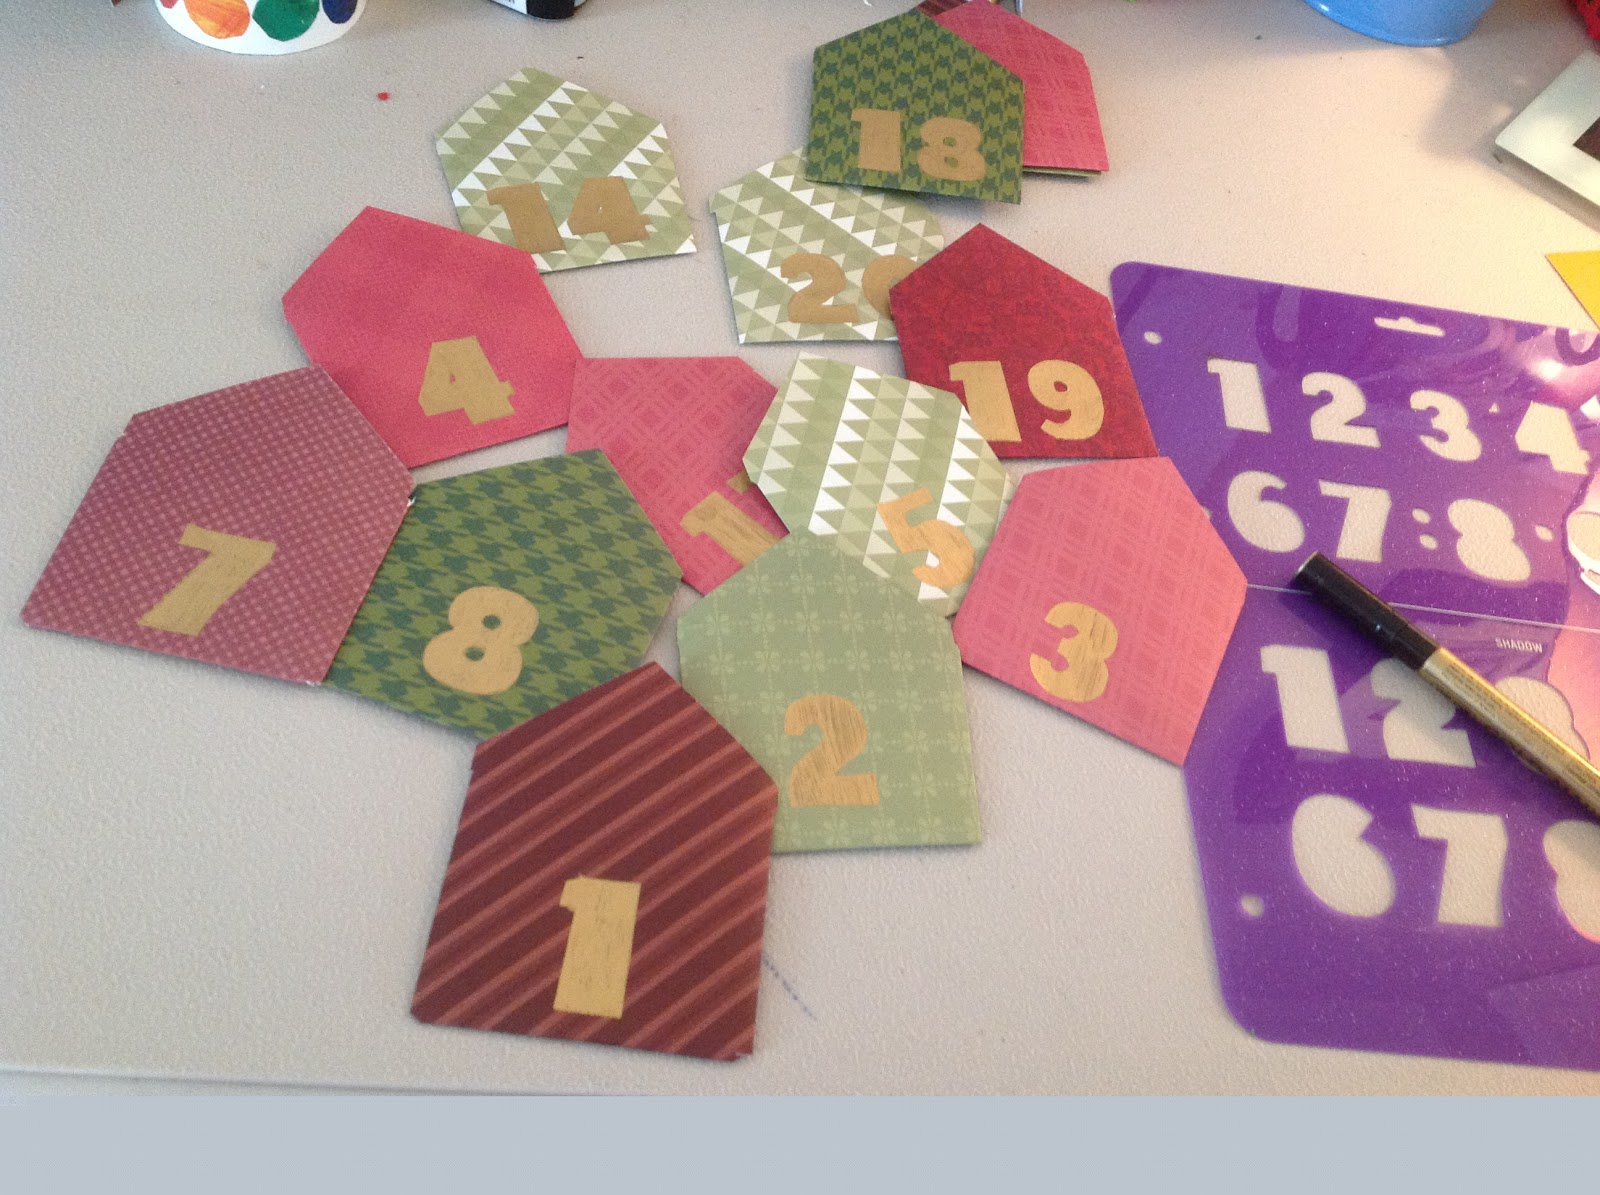
I stenciled numbers 1-24 on each envelope with a gold paint marker.


Each card is just a index card that i cut with scalloped scrapbooking scissors and then used red and green markers to write each activity on.


Right now all the envelopes are in a small basket waiting for me to decide how I'm going to display them come December. R has a calendar that he uses to play school (an actual one from when I taught preschool). I'm thinking of hanging them on there so he can open one each morning when he puts up the new number.

Here's a list of the activities I included in the envelopes:
1. Decorate the tree
2. Open your new ornament for the year.
3. Write a letter to Santa
4. Burn a Christmas cd and listen to it
5. Make Christmas cards
6. Make a card to send to a soldier
7. Attend Christmas in Carey
8. Take pictures under the tree
9. Paint in the snow or Take a train ride (weather permitting)
10. Take a trip to the Dollar Store to purchase a gift for siblings
11. Take a bath by christmas lights
12. Dinner by candlelight
13. Christmas cookie decorating
14. Christmas Movie Night
15. Go to Harrison Park to see light display
16. Make ornaments for family members
17. Build a snowman
18. Go sledding
19. Bake and take a goodie for a neighbor
20. Make gingerbread and decorate
21. Polar Express Party
22. Christmas Movie Scavenger Hunt
23. Sleepover under the Tree
24. Open 1 present under the tree (pajamas), leave cookies and milk for Santa, put out reindeer food on the lawn.

Obviously a few of these will be weather permitting, but the only 2 activities set in stone are #7 and #15 so I can always switch things around if need be. I also made a master calendar so I can look ahead and prep anything that needs done ahead of time (ie, baking, etc.) On that same calendar, I am writing down the Elf on the Shelf activities that I will be doing each night.

Mouth Watering Beef Tips in the crockpot!

Here's what's making my house smell yummy today!

Crockpot Beef Tips

Ingredients:
2-3 pounds beef stew
1 package dry onion soup mix
1 package brown gravy mix
1 1/4 c. ginger ale
1 can cream of mushroom soup
Optional: sliced mushrooms, sliced onions

Place beef in crockpot.
Mix together onion soup mix, brown gravy mix, ginger ale, and mushroom soup.
Pour over top of beef (and sliced mushrooms and onions if using)

Cook on HIGH 3-4 hours or LOW 5-6 hours.
My crockpot runs VERY hot and was done in 2 hours!

Serve over mashed potatoes or egg noodles!


This recipe also freezes very well. Place all ingredients in plastic ziploc bag and freeze. Thaw for 24 hours then follow cooking instructions.

Monday, October 1, 2012

Upcoming!

Hello everyone! The facebook page is up and running, so you can follow me here or on facebook! www.facebook/rileyscar.com

Upcoming blogs will include Sawyer's Very Hungry Caterpillar 1st Birthday (November), Elf on the Shelf ideas, 24 Days of Christmas and a few decorations for Christmas! Keep you eyes peeled for updates!

Tuesday, August 21, 2012

Birthday Interview Questions

I've gotten tons of requests to post what the Birthday Interview looked like for my son's 3rd birthday. So, instead of answering each email/post separately, I'll just toss it on here for everyone to view! Happy reading!

1. My favorite color is:
2. My favorite toy is:
3. My favorite fruit is:
4. My favorite TV show is:
5. My favorite thing to eat for lunch is:
6. My favorite outfit to wear is:
7. My favorite game is:
8. My favorite snack is:
9. My favorite animal is:
10. My favorite song is:
11. My favorite book is:
12. My best friends are:
13. My favorite cereal is:
14. My favorite thing to do outside is:
15. My favorite drink is:
16. My favorite holiday is:
17. I sleep with:
18. My favorite breakfast is:
19. I want to eat ______________ on my birthday.
20. When I grow up, I want to be:


I took several variations of the birthday interview and picked and chose which ones I liked the best for Riley's interview. Feel free to change it up to suit your own child's likes! (I didn't realize how many questions revolved around food...what can I say, my boy likes to eat. That's why he's in the 99th percentile on the growth charts!) LOL

I printed it up on Word and then trimmed it to fit on a piece of construction paper, which I then added to a piece of scrapbook paper. I painted his hand as well as 3 fingers so it looked like a cake with 3 candles. I was able to toss the whole thing straight into his scrapbook-voila! Instant page!


Wednesday, July 18, 2012

Fruit Fly Trap

If you're like me, you've got a lot of beautiful in-season fruit sitting around right now. Now, I don't know where they come from or how they get in my house, but I always end up with lots of the little things flying around my kitchen.

A few years ago I was watching a britsh show, and for the life of me I can't remeber what it's called. The premise of the show was these two older British women went into peoples houses and cleaned them up for them, then went back a month later to see if they were keeping up with the cleaning. Anyways, long story short, this cure-all is from them...

Supplies needed:

*Red wine Vinegar (please don't use your expensive kind. Go to Wal-mart and buy the $1.99 bottle!)
*Dish Soap
*Plastic wrap
*A cup

-Place 1/4 cup red wine vinegar into the cup
-Carefully drop 2/3 drops of dish soap into the vinegar (This breaks up the tension of the vinegar and the fruit flies get stuck instead of flying away)
-Cover top of cup tightly with plastic wrap. Using a knife, poke a few holes in the top of the plastic wrap. Now they can get in but not back out!

-Leave sitting on the counter for a few days. I always set the cup right in the middle of the fruit-it's like a sneaky death trap!
-Come back later and count your success!


My two favorite artists


I recently took down everything I had hanging on my kitchen walls because I was just tired of it. My kitchen is a lovely shade of yellow and my curtains are cream colored with shades of pale green and light coral. I've been looking for a few weeks for something to replace the old stuff and just hadn't found anything that struck my fancy, yet remained in my budget.

While browsing the internet one day, I can across these and couldn't resist. Plus I had a coupon! I already had the paint on hand that matched my kitchen (plain dumb luck!) and the painter's tape as well. So my new art cost me around $7 total!


I set up my two favorite artists with their supplies and let them go to town!

The canvases are 12x24 inches. I taped off Riley's name with painter's tape (I highly recommed the painters tape, I can't vouch for how regular masking tape will perform under layers of acrylic paint) Riley did his in upper and lower case letters because that's how he writes his name now.

(Riley flat out refused to touch the paint with his fingers, so he used a large paint brush)


Sawyer's was taped off in block letters for two reasons: The S and A were easier to create in block letters, and I had a harder time squeezing his letters onto the canvas)

(S wasn't too keen on the finger painting)


My beautiful new wall art!
(And as my Mom pointed out yesterday-there's still room for one more! <wink wink> LOL)


Needless to say, there's a small stack of canvas in other sizes waiting for my little Picassos to create me some new decor!

Friday, June 1, 2012

How to be a fun Mom, Pt. 1

Over the past few weeks, things have gotten a bit out of hand. Messed up schedules, travel out of town, etc. have led to outbursts, tantrums, and meltdowns. Each missed nap and late dinner was cause for an "end of the world scenario." Instead of being able to enjoy the Boys first stay in a hotel, I was busy trying to get them to bed in a timely manner and make sure they're fed on time. We all know what low blood sugar does to a 3 year old! It was enough to make me want to have outbursts, tantrums and meltdowns!
After reading an article on Pinterest about re-claiming the joy in your children, I was inspired to, how you say, let things go a little.
Tonight, we had our first ever Rock and Roll Dinner Jam. We got a Kids Bop CD at the Library the other day and I put it on while I was cooking dinner. We listened to it while we ate, then while we cleared and washed our dishes, we jammed! Directions follow:

Supplies needed:
*CD player
*Good Dance tunes (Tonights song of choice-Baby by Justin Bieber. Riley loves that song and I'm not sure why. We seriously listen to it 98 times in a row.) (Beyonce's Single Ladies was also on repeat)
*NO INHIBITIONS ALLOWED!

Directions:
1. Insert cd.
2. Press play.
3. Let the good goofy times roll!
4. Dance, march, wiggle, jump, bounce, shake, groove, get down with your bad self!

When you loosen yourself up with your child, they loosen up as well. Dance like no one is watching (Oh Lord I hope no one was watching!)

Riley and I laughed more than we had in several days. Sawyer laughed just watching us!

Who's up for Rock and Roll Dinner Jam, pt. 2???
Comment on what you jammed to! Let's make a Dinner Jam playlist!