Total Pageviews

Saturday, November 10, 2012

Very Hungry Caterpillar 1st Birthday Party

Today was S's 1st birthday party! We celebrated with a Very Hungry Caterpillar party! I have spent the last 9 months planning his party (yes, you read that correctly!) and was so excited for him and his special day! Since I started planning so early, I was able to locate so great deals and managed to not spend TOO much on his first party!


For the food, we started with a hot dog bar. I decided right off the bat that I didn't want to follow the food that is included in the book, because it isn,t a very well rounded meal. I wanted something that would be a full meal and not just random foods.
I cooked the hot dogs in a crock pot (awesome!) and they were yummy. For the sides, I included cheddar and pepper jack cheese, bacon bits, sauteed onions, coleslaw, saurkraut, and chili for toppings. I also included chili fixings in case someone didn't want hot dogs (crackers, cheese and diced onions).
The cute leaf trays are from Oriental Trading!

Next we had stuffed jalapenos and mushrooms (from the SIL!) pasta salad from my Mom, an olive cheese ball with butterfly crackers, Very Hungry Caterpillars (grapes) and cheesy caterpillars (cheese puffs.)

 I displayed the grape caterpillars on skewers stuck in a head of lettuce.

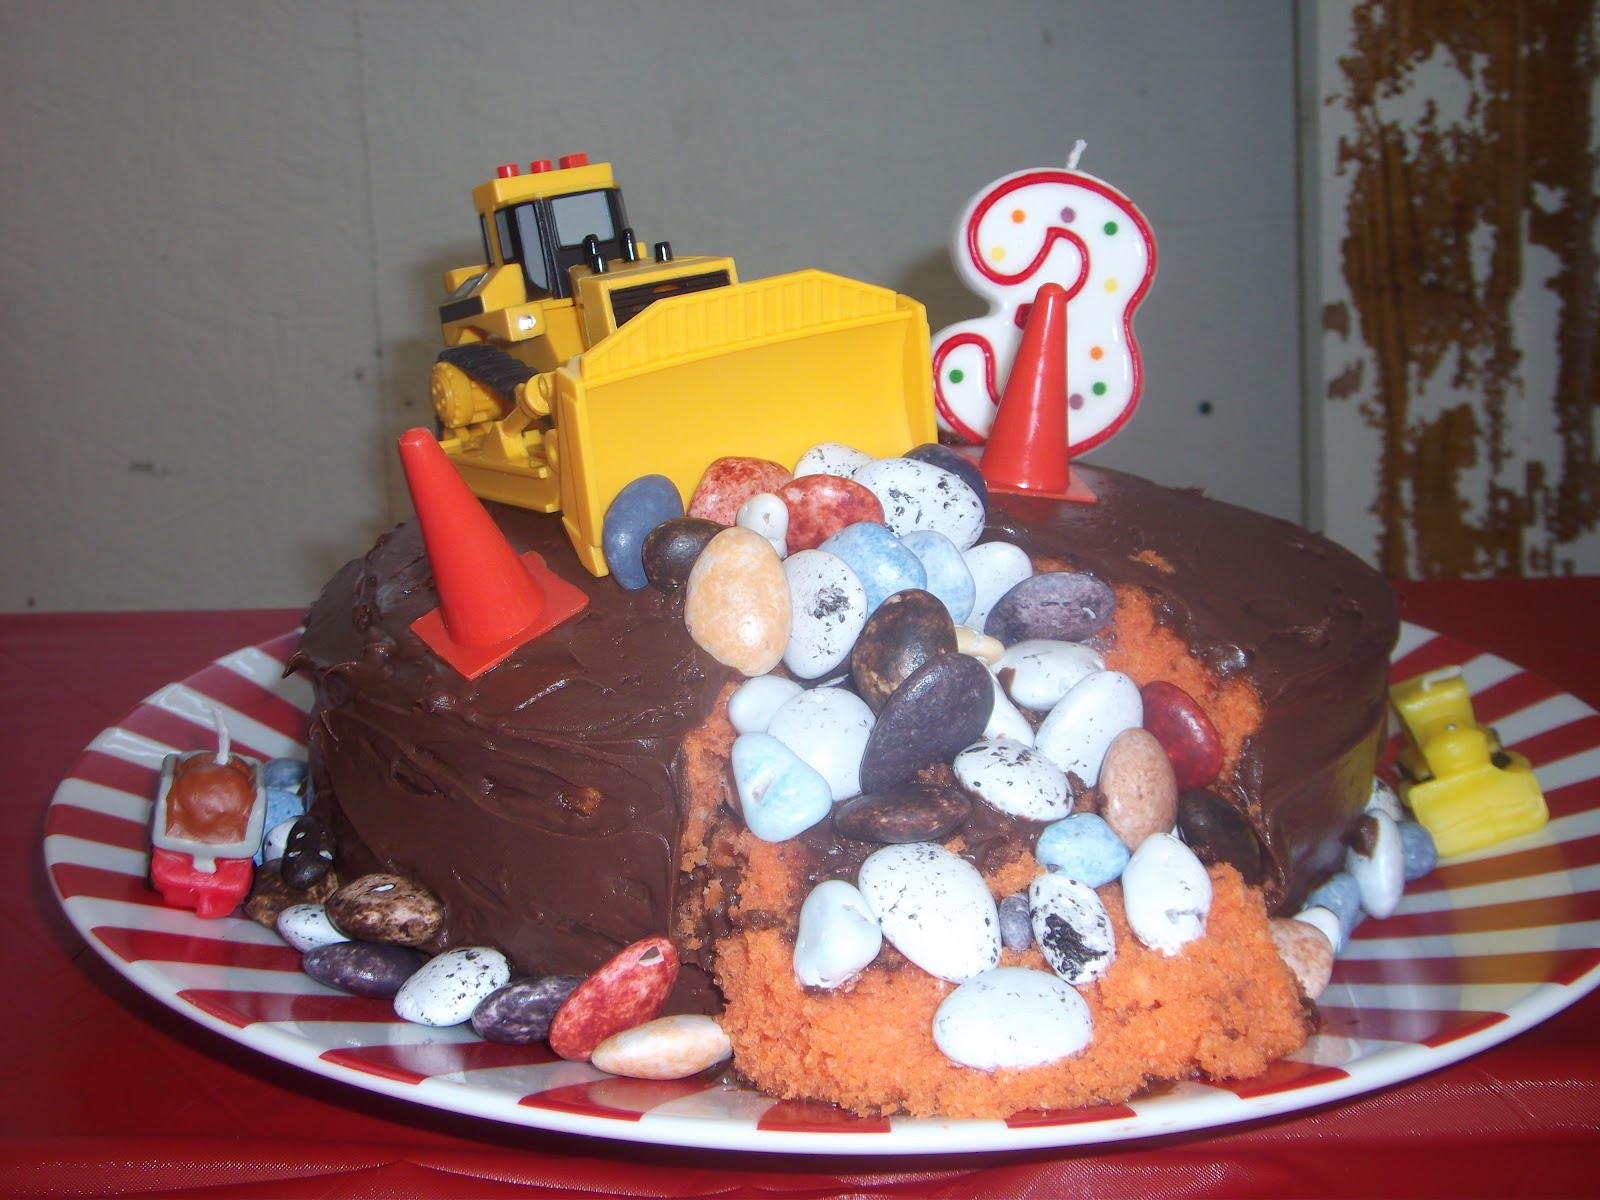
For dessert, S had his very own vegan carrot cake and everyone else enjoyed yellow cake cupcakes with buttercream frosting. The cupcakes were decorated with skittles to resemble little caterpillars.

Very Happy Cupcakes (get it?!)


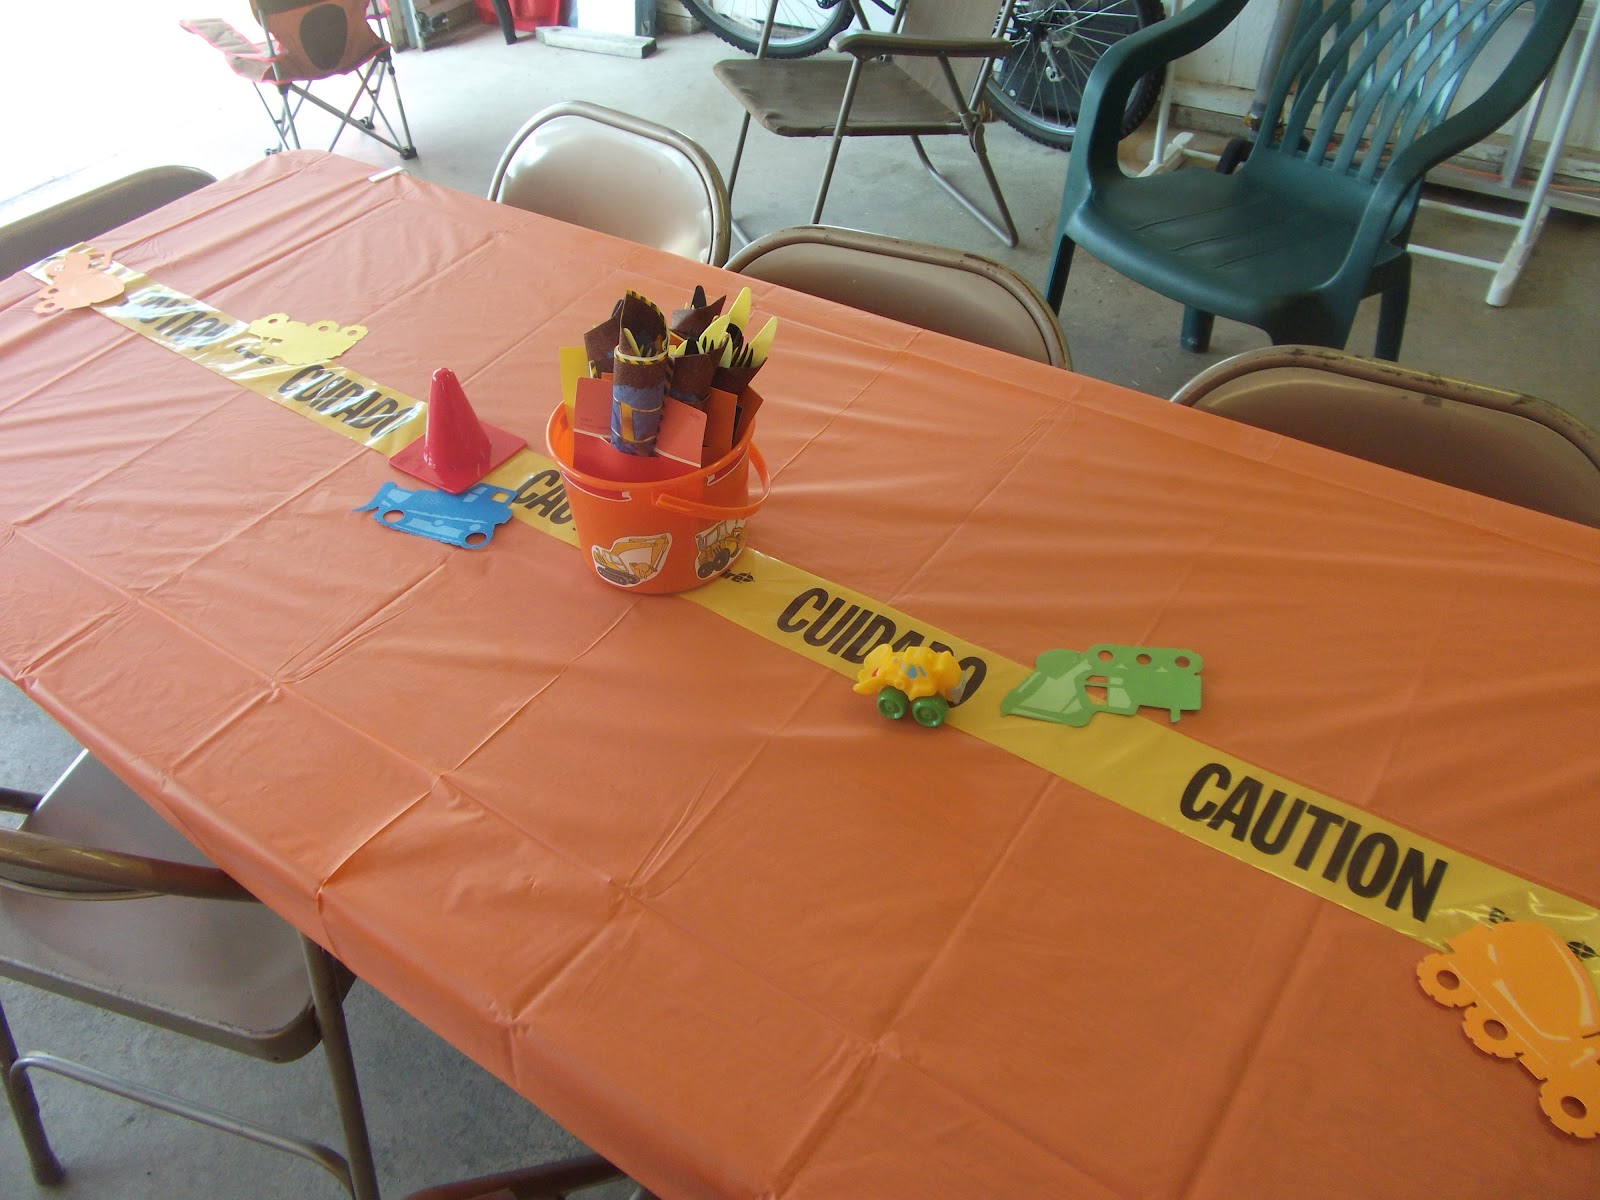
For decorations, I stuck with a red, green and lime theme.  Tableware was red with green accents.

On each table was gummy bugs for the guests and VHC coloring sheets that I found online. The little paper buckets were from the dollar section at Target!!!! 

Above the gift table, I created our own caterpillar with paper lanterns ordered from Luna Bazaar online. I found their prices to be better than anywhere local to me and they shipped in 1 day!! That's the way to earn a girls business!

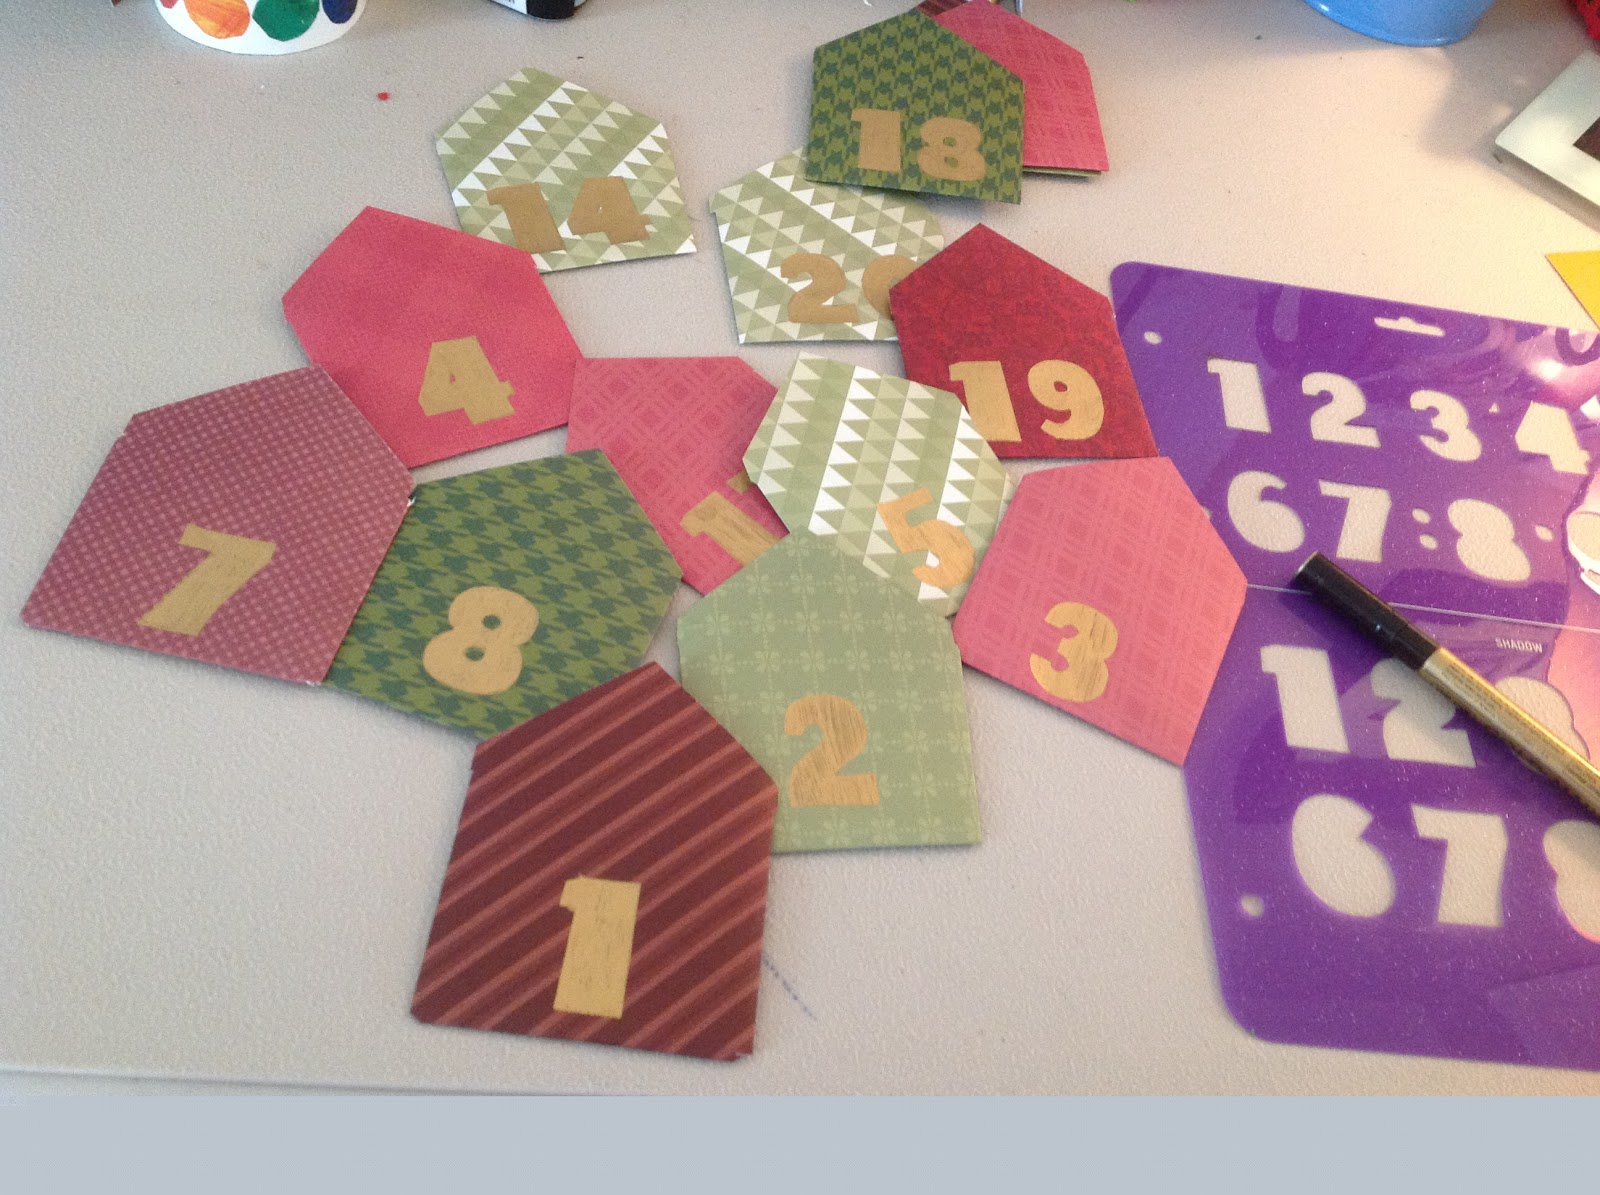
Above the cake/treat table was his birthday sign.
I used the Cricut machine to fashion the circles for his sign and cut the letters as well. It came out better than I could have hoped!


I always like to include a 12x12 page for people to sign to include in the boys scrapbooks so they can always remember who shared in their special days. (Plus it's a great way to watch the boys and their cousins grow as they learn new skills, ie. writing their own names!) This page was part of an Eric Carle scrapbook set ordered from amazon.com.

This party was the first party I threw that included children other than my own niece and nephew. There were 5 extra kiddos this time and I was excited to make gift bags, something I had never given before! The bags included bug nets and fake bugs, rubber duckies that looked like bugs, gummy bugs, bubbles, and Eric Carle crayons found once again in the Target dollar section!


I punched the thank you tags to look like they had been chewed a little. 


His high chair banner which also doubled as a prop for his cake smash photoshoot he had done last weekend.


12 months of S. I took a picture of him, every month on his birthday. He was always wearing a white shirt or onesie and sitting in the same chair with the same big stuffed elephant. I had purchased 12 month stickers from Etsy before he was even born that I could stick to the front of his shirt each month. This was a great way to track his growth and you'd be surprised how much they change from month to month!


It's hard to tell, but I made a shirt for big brother using ballons to print circles in the shape of the caterpillar. One print in red for his head, then I swirled blue and green together to get prints for the body that resembled Eric Carle's artwork.


This was such a fun and creatively inspiring theme...I've already got R's party theme picked out and am tossing a few ideas around for S's party next year. I'm sensing another book theme I think!


Raising a baby with food allergies, Part 2

Well, we FINALLY heard back from the doctor about S's allergy blood tests he had done on Monday. Unfortunately, he has a severe (mediated) allergy to eggs, and a mild milk allergy on top of the lactose intolerance. Due to the severity of his egg allergy, his pediatrician ordered him an epi pen. We were also instructed to remove all egg and dairy from his diet. He had already been placed on soy milk, but now we have to cut everything else out entirely. The last few days I have spent hours doing research online, searching mommy blogs and hospital websites for advice, brand recommendations, anything to help me wade through the mire of a huge upheaval in our diet/lifestyle. I also had to fill out an Allergy Action Plan for family, on the off chance they would ever have to feed him if my husband and I weren't there. It consists of emergency instructions, information on administering the epi pen and emergency contact information. Tomorrow, we are heading to the grocery store to do a little scoping of products in our local market. It turns out that our local Walmart carries soy milk but nothing else. No soy butters, no egg/dairy free pasta, nothing that my little guy can substitute in his diet.

I'm sure the next few weeks are going to be rough as we adjust to the new "norm." In the meantime, enjoy a picture of my little guy enjoying his first ever vegan birthday cake!


Wednesday, November 7, 2012

Raising a baby with food allergies

This week, S went in for his 1 year check up! Can you believe it?? Over the past year, we have discovered that he had several food allergies as he was introduced to new foods. He was put on an egg free diet after he tried eggs at 9 months old and broke out in a rash all over his face and neck. Since other allergies tend to go hand in hand with egg allergies, he was also put on a peanut and fish free diet.
When he was around 10 months old, I wanted to start introducing milk into his formula during meals so we could start weaning him off of formula by his first birthday. The first night I gave him milk (1 T. mixed into 4 oz. of formula) he had a horrible reaction and I felt like a terrible Momma! His poor little tummy was rock hard with gas and he cried nonstop for 5 hours. Yes, you read that right...5. hours. straight.
I followed recommendations that say if your child has a reaction, wait 2 weeks then try again. Two weeks later, he had the same reaction again. This time, however, he also broke out in a diaper rash that got so bad, it became raw and bloody. That rash took 4 days to clear up. At this point, I took him totally off of dairy products because I suspected other dairy might also be bothering him. We cut out cheese, yogurt and cottage cheese. He was still on regular formula though.
I started tracking his reactions, what he ate and if he had any problems. He did continue to have loose stools (sorry if TMI!). So finally, his 12 month checkup came around and I presented his doctor with what I had discovered. She agreed and put him on soy milk. He was also sent for allergy testing where they tested him for over 30 foods. We are still unfortunately waiting to hear back about his bloodwork, but at least we will know conclusively if he is allergic to the peanuts and fish (which he has never had any of yet)
The last three days have been spent doing research, consulting with other Mommas who have children with allergies, reading blogs, finding new recipes, and writing up his allergy plan for family members (his pediatrician told me that 9 times out of 10, an allergen will be introduced to a child by a grandparent who doesn't believe the allergy is a "big deal")!!! Three days in, and my head is swimming. What if he does have a peanut allergy? What if he's not just lactose intolerant, he's got a milk allergy too? (they are two different things!) Have you ever read a food label? Milk and nuts and eggs are in EVERYTHING! So I spend a large part of the day worrying about my sweet little boy and how he'll react to new foods...it's stressful, and I'm sure I earned new gray hairs and new wrinkles!
Hopefully tomorrow we'll have the answers we need and I'll have a better idea of what he needs to have cut out of his diet. Until then, we'll continue the soy milk (which we've seen big results from already!) and keep reading labels!

Monday, November 5, 2012

Holiday mail for Heroes

As the Holiday season approaches, I want to start teaching my 3 year old about giving back. (he's unfortunately stuck in that selfish 'me me me' stage). As part of our Advent Activity Calendar this year, we will be sending cards to active duty soldiers. I wanted to share the information I found with you, because these brave men and women are away from their own families during this time and could use our support!

The address is:

Holiday Mail for Heroes
PO BOX 5456
Capital Heights, MD 20791-5456

**MUST BE POSTMARKED BY DECEMBER 7, 2012!!

There are a few rules that they ask you follow, otherwise the mail WILL NOT be delivered.
1. Generic salutations only, nothing familiar. (ex. Dear Service Member)
2. Only cards, no letters. (You have no controls over which soldier it goes to.)
3. NO EMAIL ADDRESS OR HOME POST MARKS. (This is not a way to become pen pals. If personal information is enclosed, it will be thrown away)
4. No inserts (photos)
5. NO GLITTER!  Many of the soldiers are recovering from wounds and glitter falling from cards will hinder healing.

Each letter will be examined before passed along to service members.

Sunday, November 4, 2012

Happy Birthday Peanut!

Friday was my baby's first birthday!! It's been a long year, full of health scares, adjusting to food allergies and watching him blossom. He's my little snuggle bug and the most easy going little boy. He goes with the flow and isn't afraid of anything (including the sweeper and garbage disposer!) He loves stacking his blocks and playing with his big brother's cars. He loves waffles and climbing on stuff! He's my little daredevil! I'm so proud to be his Momma and he blessed our family with his loving heart.


Look how far we've come baby!

(Photo courtesy of Memories by Chontay)


Fill your freezer in 1 day! 9 crock pot meals for the freezer.

This week is looking to be a marathon week. My youngest celebrated his 1st birthday on Friday, and his party is coming up this Saturday! Doctors appointments, house cleaning and babysitting will fill the rest of my already busy week! So yesterday, I spent the day filling my freezer with quick and easy  meals that I can freeze and then toss in the crock pot. They require minimal ingredients and most of the items I had on hand already.


Crock pot BBQ Ribs:
-2 pounds country style ribs
-1 bottle BBQ Sauce (I used Sweet Baby Rays Honey BBQ) (Normally I would make my own BBQ sauce, but I was pressed for time with trick or treat and a photo shoot, so bottled won out this time!)

-Combine ingredients in gallon size Ziploc bag.
-Freeze flat.

TO COOK:
Thaw for 24 hours
Cook on HIGH 3-4 hours or LOW 6-7 hours
(side suggestions: mashed potatoes, cheesy potatoes, corn)


Taco Soup
-1 pound ground beer, browned
-1 chopped onion
-1 pkg taco seasoning (I use my homemade mix, so 2 T. that mix)
-1 bag frozen corn
-1 can black beans (drain and rinse)
-1 28 ounce can stewed tomatoes
-1 8 ounce can tomato sauce
-1 can diced chilies

-Cool meat
-Dump ingredients in gallon Ziploc bag

TO COOK:
-Thaw 24 hours
HIGH 1-2 hours, LOW 2-3 1/2 hours
(serve with tortilla chips, olives, cheese, sour cream)


Chicken Alfredo
-2 pounds chicken
-1 bag frozen broccoli
-2 16 ounce jars Alfredo sauce
-1 8 ounce package sliced mushrooms

-Place all ingredients in gallon bag

TO COOK:
-thaw 24 hours
LOW 4-6 hours
(serve with fettuccine noodles, salad, rolls)


French Dip Sandwiches
-2 pound chuck roast
-2 cans beef consomme

-Place in gallon bag

TO COOK:
-Thaw 24 hours
LOW 8-10 hours, HIGH 5-7 hours
(shred and serve on hoagie buns, top with provolone cheese)


Chicken Cacciatore
-1 pound chicken breasts
-1 26 ounce jar chunky veggie spaghetti sauce
-1 zucchini, chopped
-1 onion, chopped

-Mix in gallon bag

TO COOK:
-Thaw 24 hours
LOW 6-8 hours
(serve with spaghetti, garnish with olives and mozzarella cheese)


Sausage and Beans
-1 pound sausage, cooked and crumbled
-1 onion chopped
-1 rib of celery finely chopped
-1 T. worcestershire sauce
-1 1/2 tsp. dry mustard
-1/4 c. honey
-1 15 ounce can diced tomatoes
-1 can butter beans
-1 can kidney beans

-Combine in gallon bag

TO COOK:
-Thaw 24 hours
-LOW 4 hours
(Serve over rice and top with shredded cheese and tortilla chips)


Maple Dijon Chicken
-2 pounds chicken
-1 c. Dijon mustard
-1/2 c. maple syrup
-2 T. red wine vinegar
-salt and pepper

-Combine in bag

TO COOK:
-Thaw 24 hours
-LOW 8 hours


Lime Chicken
-2 pounds chicken breasts
-2 limes
-1 bag frozen corn
-2 cloves garlic minced
-1/2 red onion chopped
-1 can black beans drained and rinsed
salt and pepper

-Combine in bag

TO COOK:
-Thaw 24 hours
-LOW 8 hours
(shred chicken and serve with tortillas, sour cream, salsa, cheese)


Beef Stew
-1 pound beef stew cubes
-4 carrots cut in 2 in. pieces
-4 red potatoes cut in cubes
-1 pkg. dry onion soup mix (again I used my own homemade mix=4 T.)
-2 cans cream of mushroom soup
-1 8 ounce can tomato sauce
-1 pkg frozen peas

-Combine in bag

TO COOK:
-Thaw 24 hours
-LOW 7-10 hours, HIGH 5-6 hours


I'm sure i could have accomplished all 9 of these recipes in under 2 hours, however nap times, lunch and prepping for trick or treat and a photo shoot got in the way of completing the whole thing in one sitting. I also was able to buy all the ingredients for around $120 total. The meat is what got costly, as some of the cuts i needed were not on sale. Each could easily be substituted with cheaper cuts of meat (ie: chicken thighs, etc. and would still be just as yummy!) These meals will EASILY serve our family of four and there will be plenty of leftovers each meal.


Saturday, October 27, 2012

24 Days of Christmas Advent Calendar

In previous years, we've had Advent calendars that included small treats and toys. This year though, I wanted to focus more on experiences, rather than "stuff." With the commercialism of Christmas getting so out of hand, I felt this would be more meaningful (plus it gives me the opportunity to create lists and organize myself a little more!) My 3 year old also has gotten to the "buy me stuff" stage every time we venture to the store...we are breaking that ASAP!

While browsing through my Cricut cartridges one day, I discovered that the George Cartridge could cut envelopes. I used the cricut to cut out 24 small envelopes and stuffed each one with a meaningful experience. Since I babysit two other boys in my home several days a week, I also wanted activities that they could participate in with minimal cost to me.


I stenciled numbers 1-24 on each envelope with a gold paint marker.


Each card is just a index card that i cut with scalloped scrapbooking scissors and then used red and green markers to write each activity on.


Right now all the envelopes are in a small basket waiting for me to decide how I'm going to display them come December. R has a calendar that he uses to play school (an actual one from when I taught preschool). I'm thinking of hanging them on there so he can open one each morning when he puts up the new number.

Here's a list of the activities I included in the envelopes:
1. Decorate the tree
2. Open your new ornament for the year.
3. Write a letter to Santa
4. Burn a Christmas cd and listen to it
5. Make Christmas cards
6. Make a card to send to a soldier
7. Attend Christmas in Carey
8. Take pictures under the tree
9. Paint in the snow or Take a train ride (weather permitting)
10. Take a trip to the Dollar Store to purchase a gift for siblings
11. Take a bath by christmas lights
12. Dinner by candlelight
13. Christmas cookie decorating
14. Christmas Movie Night
15. Go to Harrison Park to see light display
16. Make ornaments for family members
17. Build a snowman
18. Go sledding
19. Bake and take a goodie for a neighbor
20. Make gingerbread and decorate
21. Polar Express Party
22. Christmas Movie Scavenger Hunt
23. Sleepover under the Tree
24. Open 1 present under the tree (pajamas), leave cookies and milk for Santa, put out reindeer food on the lawn.

Obviously a few of these will be weather permitting, but the only 2 activities set in stone are #7 and #15 so I can always switch things around if need be. I also made a master calendar so I can look ahead and prep anything that needs done ahead of time (ie, baking, etc.) On that same calendar, I am writing down the Elf on the Shelf activities that I will be doing each night.

Mouth Watering Beef Tips in the crockpot!

Here's what's making my house smell yummy today!

Crockpot Beef Tips

Ingredients:
2-3 pounds beef stew
1 package dry onion soup mix
1 package brown gravy mix
1 1/4 c. ginger ale
1 can cream of mushroom soup
Optional: sliced mushrooms, sliced onions

Place beef in crockpot.
Mix together onion soup mix, brown gravy mix, ginger ale, and mushroom soup.
Pour over top of beef (and sliced mushrooms and onions if using)

Cook on HIGH 3-4 hours or LOW 5-6 hours.
My crockpot runs VERY hot and was done in 2 hours!

Serve over mashed potatoes or egg noodles!


This recipe also freezes very well. Place all ingredients in plastic ziploc bag and freeze. Thaw for 24 hours then follow cooking instructions.

Monday, October 1, 2012

Upcoming!

Hello everyone! The facebook page is up and running, so you can follow me here or on facebook! www.facebook/rileyscar.com

Upcoming blogs will include Sawyer's Very Hungry Caterpillar 1st Birthday (November), Elf on the Shelf ideas, 24 Days of Christmas and a few decorations for Christmas! Keep you eyes peeled for updates!

Tuesday, August 21, 2012

Birthday Interview Questions

I've gotten tons of requests to post what the Birthday Interview looked like for my son's 3rd birthday. So, instead of answering each email/post separately, I'll just toss it on here for everyone to view! Happy reading!

1. My favorite color is:
2. My favorite toy is:
3. My favorite fruit is:
4. My favorite TV show is:
5. My favorite thing to eat for lunch is:
6. My favorite outfit to wear is:
7. My favorite game is:
8. My favorite snack is:
9. My favorite animal is:
10. My favorite song is:
11. My favorite book is:
12. My best friends are:
13. My favorite cereal is:
14. My favorite thing to do outside is:
15. My favorite drink is:
16. My favorite holiday is:
17. I sleep with:
18. My favorite breakfast is:
19. I want to eat ______________ on my birthday.
20. When I grow up, I want to be:


I took several variations of the birthday interview and picked and chose which ones I liked the best for Riley's interview. Feel free to change it up to suit your own child's likes! (I didn't realize how many questions revolved around food...what can I say, my boy likes to eat. That's why he's in the 99th percentile on the growth charts!) LOL

I printed it up on Word and then trimmed it to fit on a piece of construction paper, which I then added to a piece of scrapbook paper. I painted his hand as well as 3 fingers so it looked like a cake with 3 candles. I was able to toss the whole thing straight into his scrapbook-voila! Instant page!


Wednesday, July 18, 2012

Fruit Fly Trap

If you're like me, you've got a lot of beautiful in-season fruit sitting around right now. Now, I don't know where they come from or how they get in my house, but I always end up with lots of the little things flying around my kitchen.

A few years ago I was watching a britsh show, and for the life of me I can't remeber what it's called. The premise of the show was these two older British women went into peoples houses and cleaned them up for them, then went back a month later to see if they were keeping up with the cleaning. Anyways, long story short, this cure-all is from them...

Supplies needed:

*Red wine Vinegar (please don't use your expensive kind. Go to Wal-mart and buy the $1.99 bottle!)
*Dish Soap
*Plastic wrap
*A cup

-Place 1/4 cup red wine vinegar into the cup
-Carefully drop 2/3 drops of dish soap into the vinegar (This breaks up the tension of the vinegar and the fruit flies get stuck instead of flying away)
-Cover top of cup tightly with plastic wrap. Using a knife, poke a few holes in the top of the plastic wrap. Now they can get in but not back out!

-Leave sitting on the counter for a few days. I always set the cup right in the middle of the fruit-it's like a sneaky death trap!
-Come back later and count your success!


My two favorite artists


I recently took down everything I had hanging on my kitchen walls because I was just tired of it. My kitchen is a lovely shade of yellow and my curtains are cream colored with shades of pale green and light coral. I've been looking for a few weeks for something to replace the old stuff and just hadn't found anything that struck my fancy, yet remained in my budget.

While browsing the internet one day, I can across these and couldn't resist. Plus I had a coupon! I already had the paint on hand that matched my kitchen (plain dumb luck!) and the painter's tape as well. So my new art cost me around $7 total!


I set up my two favorite artists with their supplies and let them go to town!

The canvases are 12x24 inches. I taped off Riley's name with painter's tape (I highly recommed the painters tape, I can't vouch for how regular masking tape will perform under layers of acrylic paint) Riley did his in upper and lower case letters because that's how he writes his name now.

(Riley flat out refused to touch the paint with his fingers, so he used a large paint brush)


Sawyer's was taped off in block letters for two reasons: The S and A were easier to create in block letters, and I had a harder time squeezing his letters onto the canvas)

(S wasn't too keen on the finger painting)


My beautiful new wall art!
(And as my Mom pointed out yesterday-there's still room for one more! <wink wink> LOL)


Needless to say, there's a small stack of canvas in other sizes waiting for my little Picassos to create me some new decor!

Friday, June 1, 2012

How to be a fun Mom, Pt. 1

Over the past few weeks, things have gotten a bit out of hand. Messed up schedules, travel out of town, etc. have led to outbursts, tantrums, and meltdowns. Each missed nap and late dinner was cause for an "end of the world scenario." Instead of being able to enjoy the Boys first stay in a hotel, I was busy trying to get them to bed in a timely manner and make sure they're fed on time. We all know what low blood sugar does to a 3 year old! It was enough to make me want to have outbursts, tantrums and meltdowns!
After reading an article on Pinterest about re-claiming the joy in your children, I was inspired to, how you say, let things go a little.
Tonight, we had our first ever Rock and Roll Dinner Jam. We got a Kids Bop CD at the Library the other day and I put it on while I was cooking dinner. We listened to it while we ate, then while we cleared and washed our dishes, we jammed! Directions follow:

Supplies needed:
*CD player
*Good Dance tunes (Tonights song of choice-Baby by Justin Bieber. Riley loves that song and I'm not sure why. We seriously listen to it 98 times in a row.) (Beyonce's Single Ladies was also on repeat)
*NO INHIBITIONS ALLOWED!

Directions:
1. Insert cd.
2. Press play.
3. Let the good goofy times roll!
4. Dance, march, wiggle, jump, bounce, shake, groove, get down with your bad self!

When you loosen yourself up with your child, they loosen up as well. Dance like no one is watching (Oh Lord I hope no one was watching!)

Riley and I laughed more than we had in several days. Sawyer laughed just watching us!

Who's up for Rock and Roll Dinner Jam, pt. 2???
Comment on what you jammed to! Let's make a Dinner Jam playlist!

Thursday, May 31, 2012

Riley's 3rd Birthday-Construction Themed

On May 19, 2012 we celebrated Riley's 3rd birthday. Thanks to all the local construction that's been going on in our town (much right outside our own front door) Riley had developed an obsession with all things digger. So naturally when it came time to plan his party, the construction theme was a first choice! 

I handmade all the invitations using a Cricut and die-cuts from the Dollar Tree!


The inside of the invitations say:
Can you dig it? Riley is turning 3!
Clock in on May 19, 2012 at 1pm.
Job Site: (our address)
RSVP to: (Our phone number)

Juice bottles for Riley and his cousins

I made a vanilla cake that I dyed orange. I went a little overboard with the red food coloring and had to over compensate with the yellow. Thus the fluorescent orange!

More bags from the dollar store! (Imagine my joy at finding a dump truck bag for $1!!)

The silverware and napkins

The wreath for our front door-made entirely from things I already had around the house (extension cord, caution tape, cardboard and scrapbook paper)


The day of his party was sunny and 87 degrees...in May!
I used a color scheme of orange, yellow and black, with hints of dark green thrown in to break it up)

His sign welcoming guests
(It was so hot that the balloons started popping and the letters were peeling off the poster board)

Table decorations: orange tablecloth, construction tape, die-cuts and good old vehicles from Riley's toy box. (He wasn't very happy about having to surrender those for the party!)

The orange buckets are holding the silverware. Yellow and black utensils (again, dollar store) in digger napkins (found on clearance at the Party Store!) and stuck through a paint chip from Lowe's (free!)


Riley's 3 year old interview (upcoming post) with a birthday cake made from his own hand print. The paper on the right is a sheet for guests to sign for his scrapbook.

The Digger cake!

I iced it with chocolate icing (dirt) then cut a chunk out and used chocolate rocks to fill in the space. (From Wal-Mart!)


More of his stash from his toy box


The Birthday Boy and his new big boy bike! He wore a digger shirt that I found on clearance at JC Penny's last summer. His brother also wore a shirt that said "I dig my Dad" with a digger on it-again, found on clearance!)

The Menu:
"Build your own" deli sandwiches
Pasta salad made from wheel pasta
chips and snacks
watermelon
fruit pizza
reuben casserole
stuffed mushrooms/jalapenoes
Pop/water/juice for kiddos


In all, I spent around $150.00 on this party ($85 of which was food) (not counting presents). The majority of stuff came either from my own house or the Dollar Tree. Splurges were the Chocolate rocks-$4 total, Caution tape-$5 and the Bob The Builder juice bottles-$6.


Look how far you've come! I love you Monkey!


Wednesday, April 4, 2012

Kids in the Kitchen Pt. 1-April

Looking for an easy way to incorporate math, science and reading/listening skills into your day with you toddler? Take up cooking! This post will the be the first in what I hope will be a monthly series on cooking with your children. I love cooking, and so does Riley. He's been working with me in the kitchen since he was about 18 months old. Pretty much since he was old enough to stand on a chair next to me at the counter. (Though he also views this time as water play time when we wash dishes, which is his most favorite thing to do!)

We started slowly, with him just stirring ingredients together. Lately we've worked up to counting, measuring and have added in knife skills within the last few weeks. (DISCLAIMER: I know not everyone would be comfortable teaching a 2 year old knife skills. We do discuss how knives can hurt you, and proper use. He also only uses a butter knife, or a plastic knife. He also is always standing right next to me, properly supervised!)

Today we used our kitchen time to practice counting, adding, measuring, and counting by 2's. We have an Easter Party to attend tomorrow and we decided to make rice krispy treats to take. It's smart to start out with simple recipes so that you and your child don't become overwhelmed with ingredients/prep trying to complete a difficult recipe. 

Rice Krispy Treats:

4 T. butter
6 c. crispy cereal
4 c. mini marshmallows

-Melt butter and marshmallows in pan
-Measure out cereal in large bowl.
-Pour melted marshmallow mixture on top of cereal and mix until combined.
-Pour in greased 9x13 pan

(since it's for Easter, we added pink food coloring to the melted marshmallows and sprinkled Easter M&M's on top!)

He's got his apron on and all his tools ready to go!


 Measuring out the cereal


 Best part-licking the spoon!!!
(He unfortunately photographs like me, that's why he looks high in all his pics!)

Yummy gooey goodness!


 Of course we made a batch for ourselves as well. He picked blue for our batch!

Take the time to bring your kids into the kitchen. It's excellent bonding time, plus your teaching them a valuable life skill! You don't have to teach them 5 course meals, pancakes will be just as fun for them!
(Plus your sons wives will thank you some day!)

Monday, April 2, 2012

Spring Break Boredom Busters 2012

I know a large majority of my friends with school age children woke up this morning and said "Oh crap shoot! The kids are out of school this week...now what?!?!"
"Hi, my name is Sara, and I'm here to help!"
Below is a list of 6 kid tested activities that are sure to keep your kids busy (for at least 10 minutes, I promise!)
Enjoy!


MAGICAL COLOR-CHANGING DRINKS
-drop food coloring in bottom of a cup, let dry overnight
-Add ice in cup
-Pour in water or clear pop for a magical surprise!


BAKING SODA CLAY
2 c. baking soda
1 c. corn starch
1 1/4 c. water
food coloring (optional)

-Combine all ingredients
-Cook over medium heat until mixture resembles mashed potatoes
-Remove from heat and let cool in a glass bowl covered with a damp towel
-Sculpt using water to make pieces stick together
-Dry out for 2 days
-Paint with acrylic paint (can be sanded)


SIDEWALK CHALK PAINT
1/4 c. cornstarch
1/4 c. water
food coloring
-Mix water and cornstarch, divide into small bowls
-Color with food coloring of choice
-Paint on sidewalk/driveway (completely washes away in rain or with hose)


SHARPIE TIE-DYE
-Rubberband pre-washed white t shirt over plastic cups
-Color small circle with sharpie in center of shirt
-slowly drop rubbing alcohol onto marker
-watch as color spreads!
-Heat set in hot wash or with warm iron


 CLOUD DOUGH
8 c. flour
1 c. baby oil

-combine ingredients together
-may take several minutes or mixing for dough to be moldable


TIME CAPSULE
Studies show that between the ages of 6-9, kids are the most interested in where they came from. Why not start early and put together a time capsule for when they reach that quizzical age?! Here is a list of suggestions to include. Gather supplies and fill a box then hide it away in a closet for a few years!

-List of favorites things (ex. foods, friends, toys, games, shows, etc.)
-Load of shredded paper (to toss around when you open it!)
-Favorite character toy
-Current family picture
-a Hand print and footprint to compare later
-Note of current height and weight

**Please expand on this list. This is just to get you started!