Total Pageviews

Thursday, May 31, 2012

Riley's 3rd Birthday-Construction Themed

On May 19, 2012 we celebrated Riley's 3rd birthday. Thanks to all the local construction that's been going on in our town (much right outside our own front door) Riley had developed an obsession with all things digger. So naturally when it came time to plan his party, the construction theme was a first choice! 

I handmade all the invitations using a Cricut and die-cuts from the Dollar Tree!


The inside of the invitations say:
Can you dig it? Riley is turning 3!
Clock in on May 19, 2012 at 1pm.
Job Site: (our address)
RSVP to: (Our phone number)

Juice bottles for Riley and his cousins

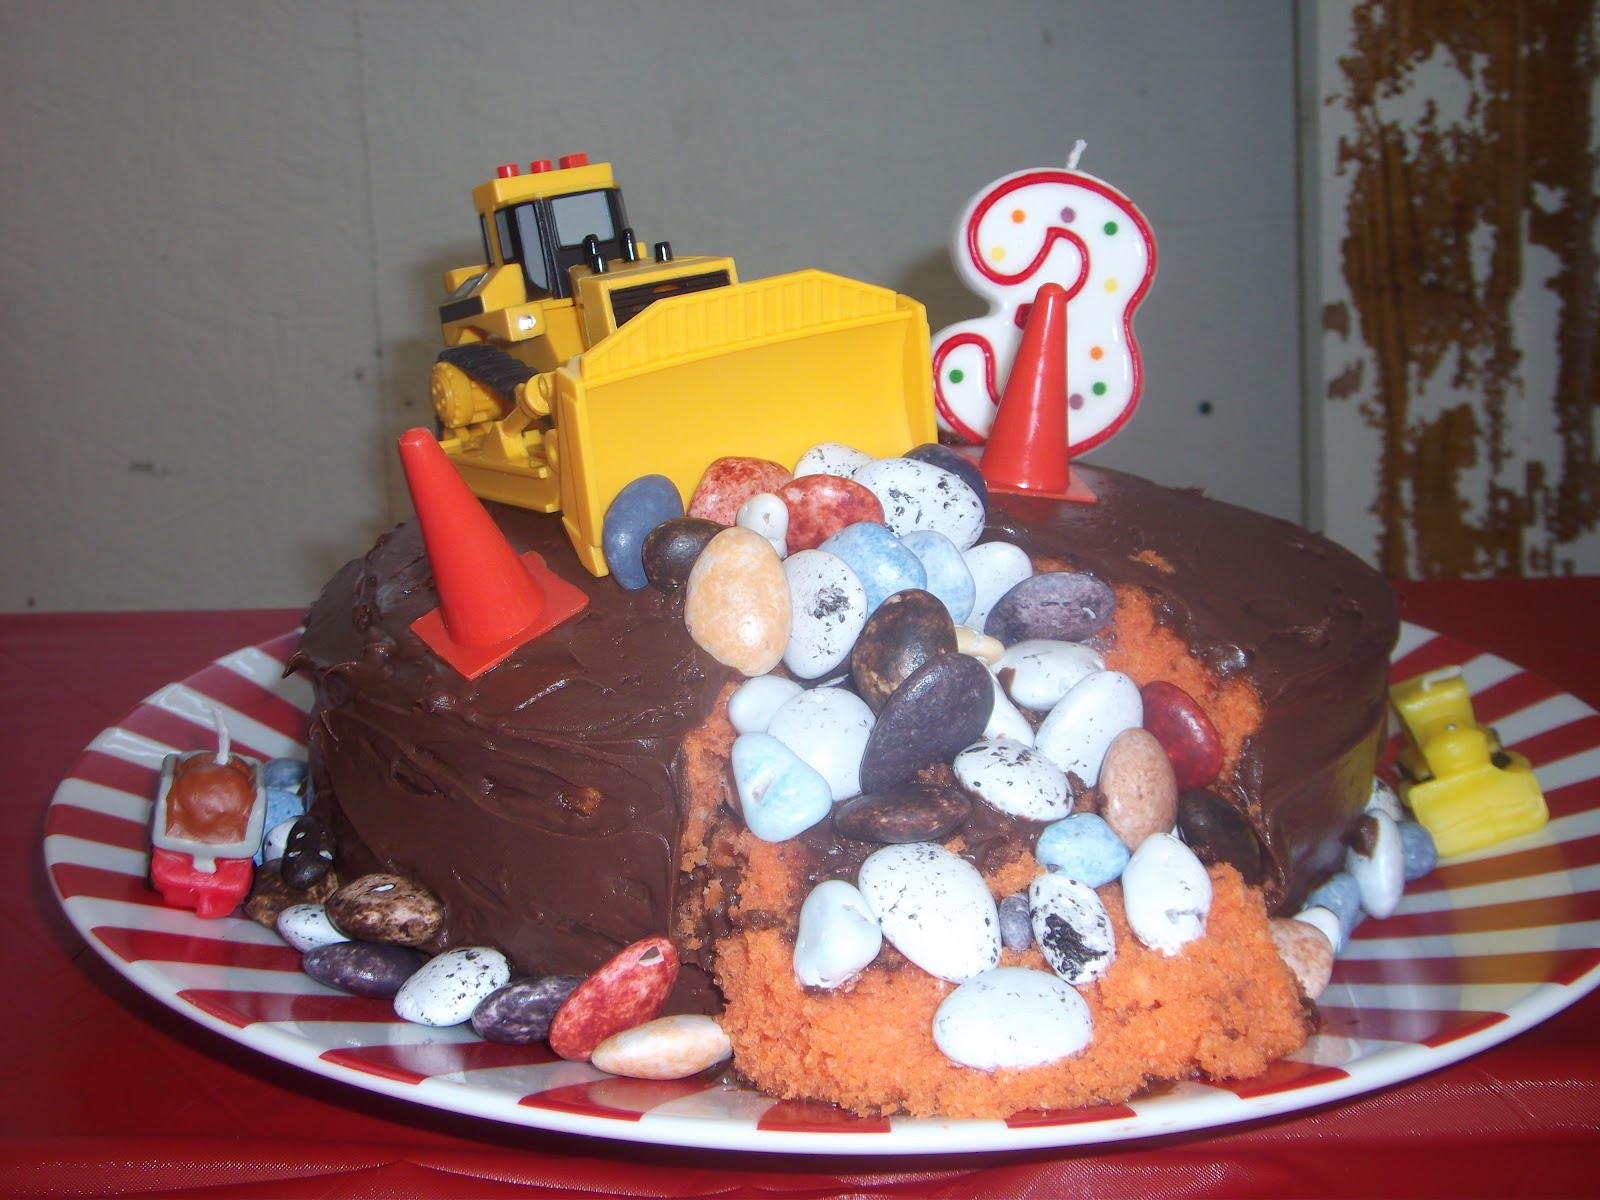
I made a vanilla cake that I dyed orange. I went a little overboard with the red food coloring and had to over compensate with the yellow. Thus the fluorescent orange!

More bags from the dollar store! (Imagine my joy at finding a dump truck bag for $1!!)

The silverware and napkins

The wreath for our front door-made entirely from things I already had around the house (extension cord, caution tape, cardboard and scrapbook paper)


The day of his party was sunny and 87 degrees...in May!
I used a color scheme of orange, yellow and black, with hints of dark green thrown in to break it up)

His sign welcoming guests
(It was so hot that the balloons started popping and the letters were peeling off the poster board)

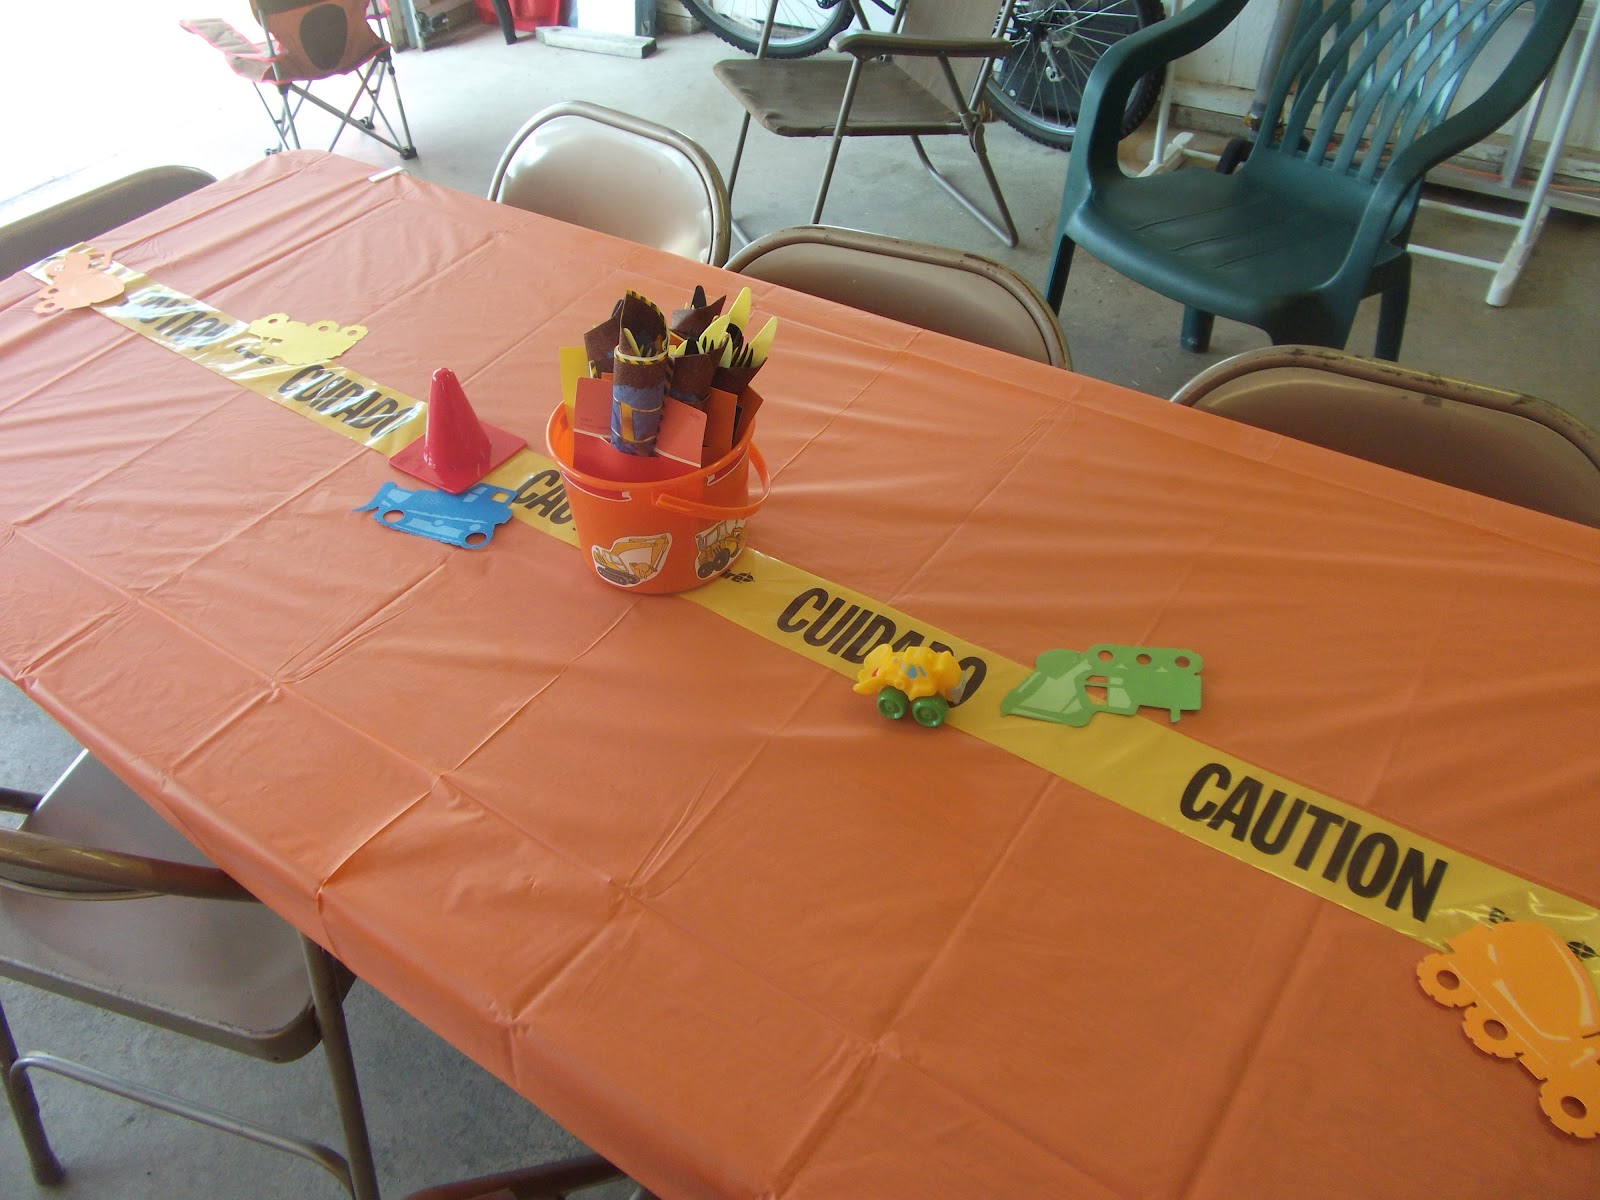
Table decorations: orange tablecloth, construction tape, die-cuts and good old vehicles from Riley's toy box. (He wasn't very happy about having to surrender those for the party!)

The orange buckets are holding the silverware. Yellow and black utensils (again, dollar store) in digger napkins (found on clearance at the Party Store!) and stuck through a paint chip from Lowe's (free!)


Riley's 3 year old interview (upcoming post) with a birthday cake made from his own hand print. The paper on the right is a sheet for guests to sign for his scrapbook.

The Digger cake!

I iced it with chocolate icing (dirt) then cut a chunk out and used chocolate rocks to fill in the space. (From Wal-Mart!)


More of his stash from his toy box


The Birthday Boy and his new big boy bike! He wore a digger shirt that I found on clearance at JC Penny's last summer. His brother also wore a shirt that said "I dig my Dad" with a digger on it-again, found on clearance!)

The Menu:
"Build your own" deli sandwiches
Pasta salad made from wheel pasta
chips and snacks
watermelon
fruit pizza
reuben casserole
stuffed mushrooms/jalapenoes
Pop/water/juice for kiddos


In all, I spent around $150.00 on this party ($85 of which was food) (not counting presents). The majority of stuff came either from my own house or the Dollar Tree. Splurges were the Chocolate rocks-$4 total, Caution tape-$5 and the Bob The Builder juice bottles-$6.


Look how far you've come! I love you Monkey!


Wednesday, April 4, 2012

Kids in the Kitchen Pt. 1-April

Looking for an easy way to incorporate math, science and reading/listening skills into your day with you toddler? Take up cooking! This post will the be the first in what I hope will be a monthly series on cooking with your children. I love cooking, and so does Riley. He's been working with me in the kitchen since he was about 18 months old. Pretty much since he was old enough to stand on a chair next to me at the counter. (Though he also views this time as water play time when we wash dishes, which is his most favorite thing to do!)

We started slowly, with him just stirring ingredients together. Lately we've worked up to counting, measuring and have added in knife skills within the last few weeks. (DISCLAIMER: I know not everyone would be comfortable teaching a 2 year old knife skills. We do discuss how knives can hurt you, and proper use. He also only uses a butter knife, or a plastic knife. He also is always standing right next to me, properly supervised!)

Today we used our kitchen time to practice counting, adding, measuring, and counting by 2's. We have an Easter Party to attend tomorrow and we decided to make rice krispy treats to take. It's smart to start out with simple recipes so that you and your child don't become overwhelmed with ingredients/prep trying to complete a difficult recipe. 

Rice Krispy Treats:

4 T. butter
6 c. crispy cereal
4 c. mini marshmallows

-Melt butter and marshmallows in pan
-Measure out cereal in large bowl.
-Pour melted marshmallow mixture on top of cereal and mix until combined.
-Pour in greased 9x13 pan

(since it's for Easter, we added pink food coloring to the melted marshmallows and sprinkled Easter M&M's on top!)

He's got his apron on and all his tools ready to go!


 Measuring out the cereal


 Best part-licking the spoon!!!
(He unfortunately photographs like me, that's why he looks high in all his pics!)

Yummy gooey goodness!


 Of course we made a batch for ourselves as well. He picked blue for our batch!

Take the time to bring your kids into the kitchen. It's excellent bonding time, plus your teaching them a valuable life skill! You don't have to teach them 5 course meals, pancakes will be just as fun for them!
(Plus your sons wives will thank you some day!)

Monday, April 2, 2012

Spring Break Boredom Busters 2012

I know a large majority of my friends with school age children woke up this morning and said "Oh crap shoot! The kids are out of school this week...now what?!?!"
"Hi, my name is Sara, and I'm here to help!"
Below is a list of 6 kid tested activities that are sure to keep your kids busy (for at least 10 minutes, I promise!)
Enjoy!


MAGICAL COLOR-CHANGING DRINKS
-drop food coloring in bottom of a cup, let dry overnight
-Add ice in cup
-Pour in water or clear pop for a magical surprise!


BAKING SODA CLAY
2 c. baking soda
1 c. corn starch
1 1/4 c. water
food coloring (optional)

-Combine all ingredients
-Cook over medium heat until mixture resembles mashed potatoes
-Remove from heat and let cool in a glass bowl covered with a damp towel
-Sculpt using water to make pieces stick together
-Dry out for 2 days
-Paint with acrylic paint (can be sanded)


SIDEWALK CHALK PAINT
1/4 c. cornstarch
1/4 c. water
food coloring
-Mix water and cornstarch, divide into small bowls
-Color with food coloring of choice
-Paint on sidewalk/driveway (completely washes away in rain or with hose)


SHARPIE TIE-DYE
-Rubberband pre-washed white t shirt over plastic cups
-Color small circle with sharpie in center of shirt
-slowly drop rubbing alcohol onto marker
-watch as color spreads!
-Heat set in hot wash or with warm iron


 CLOUD DOUGH
8 c. flour
1 c. baby oil

-combine ingredients together
-may take several minutes or mixing for dough to be moldable


TIME CAPSULE
Studies show that between the ages of 6-9, kids are the most interested in where they came from. Why not start early and put together a time capsule for when they reach that quizzical age?! Here is a list of suggestions to include. Gather supplies and fill a box then hide it away in a closet for a few years!

-List of favorites things (ex. foods, friends, toys, games, shows, etc.)
-Load of shredded paper (to toss around when you open it!)
-Favorite character toy
-Current family picture
-a Hand print and footprint to compare later
-Note of current height and weight

**Please expand on this list. This is just to get you started!

Hand print Chick Easter shirt

My 2 year old (almost 3!) is big for his age. He's in 5T's already and they just don't make cute holiday clothes in his size anymore! I had found a cute onesie for Sawyer for Easter and was looking for something for Riley with no luck. So I did what any self-respecting teacher would do; make it myself!! I am a HUGE fan of hand print art. I try not to save a whole ton of art from Riley's class, but anything with his hand print/fingerprints goes straight into his special box of stuff I'm keeping for him. So I browsed around the internet. At first I was specifically looking for thumbprint chicks, but found this hand print bird that I liked better. The teaching website I found it on originally made it as a bluebird. One bottle of Sunny Yellow paint later, it's a cute Easter Chick!

Step 1: Mix 2 parts acrylic paint with one part Textile medium


Step 2: paint subject's hand making sure to fill in all the chubby wrinkles :o)

Step 3: carefully print hands on shirt

Step 4: Use orange acrylic paint to create beaks and legs. Use a fabric marker to 
make the eyes and wings


**Note: The bottle of textile medium says to allow the shirt to dry before heat setting for 7 days. Unfortunately we were under a time constraint and I only had 3 days for it to dry. After it dried, I laid an old towel over top and used my iron on the cotton setting to heat set the paint!

Sunday, April 1, 2012

My love letter to Pinterest...

My dearest Pinterest;
   Where were you all my life?!? How did I ever get along before knowing about the Dawn and vinegar cleaner? Or bacon pancakes? Or even yogurt drops??? True, you did let me down on a few occasions...broccoli soup, parmesan honey pork. But to make up for it, you brought me Crack bread...and cinnamon roll cake. <sigh> How I do love thee...

Here are a few of our Pinterest experiments:


Yogurt Drops-squirt on tray, freeze, voila! Instant yummy frozen treat! (Note: They thaw extremely fast! Not the best for a dawdling toddler... I may try adding some juice the next time I make these to see if that helps the thawing time)

With both boys on antibiotics at any given time of the year, it gets tricky tracking their doses. Hello handy helper! Use a permanent marker, write AM/PM and check it off as you administer the dose. Easy peasy dosing!


Muffin Tin Meals-the cure to picky eaters! Makes any meal more interesting and fun for a child who doesn't want to eat. Riley now enjoys picking out the cupcake liners he wants and choosing what should fill each hole. Another bonus-instant portion control!


The grand finale--bacon pancakes. Hellooooo gorgeous! 

1.) Precook bacon in pan. Only cook about 2/3 of the way, so it's still floppy 
(for better use of a word)


2.) Pour premixed pancake batter over top of bacon, covering entire strip. Flip pancake when it gets bubbly on top.

MmmmMMmmmmMMMmmmmm
(insert drooling here!)


Wednesday, March 28, 2012

30 Tasks in 30 Days Challenge

With March coming to an end and April closing in upon us, I am inspired to tackle the big ginormous job of spring cleaning. With 2 kids under the age of 3, I don't have large chunks of time where I can sit and tackle a whole room in one sitting. So I created 2 different challenges to get the job done. I'd love for some company as I attack my house!

30 Tasks in 30 Days Challenge:
1 task a day for 30 days...
(Your goal is to clean out 1 bag of junk from each task to trash/donate/sell, etc.)

1. Junk drawer
2. Utensil drawer
3. Kids dishes
4. Pantry
5. Under kitchen sink
6. Fridge
7. Spice cabinet
8. Office desk drawers
9. Magazines/catalogs
10. Closet (clothes/shoes)
11. Closet (Hubby)
12. Dresser drawers
13. Night stand
14. TV cabinet
15. Accessories
16. Jewelery
17. Makeup bag
18. Bathroom drawers/bath toys
19. Kids closet
20. kids closet
21. Kids dressers
22. Toys
23. Upstairs closet
24. Scrapbooking stuff
25. Laundry Room
26. Garage (Tool bench)
27. Garage Shelves/lockers
28. Garage (general)
29. Cookbook cupboard
30. Car/console

Feel free to alter as you see fit. Keep me updated on your progress!


Thursday, March 22, 2012

SAHM'ing it!

Ever the worrier, I've been concerned about Riley's (and eventually Sawyer's) continued progress educationally now that they aren't in preschool anymore. So I sat down and developed a short term curriculum so that they continue to be exposed to the educational values that are so important before kindergarten.
Riley already knows his colors, shapes, letters, he can spell his name and can read about 15 high frequency words. We have started working on his writing and letter sounds as well as continuing to review the previous skills. I also added in math, literacy and science activities as well. I created what Riley calls his "learning basket" which I fill with books/activities/objects, etc. that correspond with each weeks theme.

March 11-17 Letter A/St. Patrick's Day


The basket this week included:
-A books (A was once an Apple Pie, My A Book, Alphabet Construction)
-A cards to review the A sound
-A collage paper
-foam A's for art
-Rainbow A's
-St Patrick's Day rainbow handprint art
-St. Patrick's Day books
-coupon cutting
Thanks to his obsession with all things with wheels, I found these letters that look like roads and made up his name to practice spelling.

We utilized the easel for several activities this week, including writing and painting our letters

Arrow punch for letter A

Number matching with puffballs


Handwriting exercises (Big A)

(Little a)
We made rainbow rice for St Patty's Day

Practiced our color mixing to make green eggs for breakfast on St. Patrick's Day
(blue and yellow make whaaaaaaaa??)


After making up some batches of avocado baby food, we planted the avocado seeds to see if they will sprout (we're also trying to sprout green onions as well)

Here's what the start of the letter B basket looks like. It includes buttons, Bb books and cards, B art. It also includes some Easter books as well.