Total Pageviews

Saturday, March 17, 2012

It's been 1 month...

It has officially been one month since I quit my job to stay home with the boys! It's been a transition from the world of a working Momma to staying home...actually a little harder than I thought it would be. I find myself baffled as to why I seem to have more laundry now than I did when I was working...hmm?

The main reason I quit my job is because, as a preschool teacher, not making any money seemed to be the norm. After paying my child care costs, I was bring home a measly $50 a paycheck. Not exactly rolling in the dough, is it?? There were some other reasons, personal reasons, that I wanted to stay home too. I found after the birth of Sawyer that I struggled with some postpartum depression...I found it hard to get out of bed in the morning. I had lost my motivation to really do anything other than stay home with the boys. I had lost the joy in teaching that I had once had. I didn't feel like a normal functioning person anymore!

So we made the choice for me to stay home. We pulled the boys from daycare and stayed home. Now I see them 24 hours a day, 7 days a week. I am the one responsible for their early education. I am solely responsible for getting Sawyer on a schedule (yikes). The first 2 weeks we were home was spent getting Sawyer back to optimum health. He spent 2 months of his tiny 4 month life in and out of the hospital with pneumonia and RSV. His lungs were weak and day care germs weren't giving him a fighting chance. Now that he's been home, he's thriving! He's gained back the weight he lost and is chunking up, my little piggy!

Over the last week, we did make some changes to our daily schedule. I found that as we were adjusting to being at home, we were becoming a little stagnant. True, we went to story hour at the library and we were playing outside for a couple of hours every day (80 degrees in March?!?!) but I'm concerned about Riley falling behind other children who will be in preschool up until kindergarten. So, I did what I do best...I created a curriculum for him! He now has a basket of activities to complete every week that include literacy, science, art and math skills. He completed his first basket yesterday. He calls it his "Learning Basket."

So, we're learning to adjust to our new schedule. We are learning to budget our time. We are learning to lean on each other. I'm getting used to being the sole dish washer, laundry washer, maid, chauffeur, cook, etc. It's taking some time to get used to not being out in the world with other adults. But how could I say no to them?

Sunday, February 5, 2012

Baby's first hospital stay-January 27, 2012

Well, Sawyer had his first health scare this past week. He ended up in the hospital with pneumonia. :(

On Thursday night, he spiked a high fever (102.7 to be exact) and I debated running him to the ER that night. I was home alone with the boys and Riley was already in bed, so I gave him some tylenol and put him to bed. By Friday, his temp had come down a little, but he was coughing pretty badly. I went to work and tried to get him into the pediatrician. Of course they closed before I got off work! So I headed to Urgent Care. The nurses took his temp there and it was 101.6 and rising. They also placed him on oxygen because His saturation was in the high 70-low 80 percentile. Ideally it should have been in the mid to high nineties! I never even saw a doctor at Urgent Care, the nurses sent me straight to the ER. They wanted to transport him by ambulance, but I had Riley with me and they wouldn't transport him. When we arrived at the hospital, they took him right back and put him back on oxygen. The pediatric specialist said she thought it was pneumonia, but wanted to test him for RSV and some other things as well as get a chest x-ray.

He got his x-rays which showed he had pneumonia in his right lung. After that, they placed an IV to start him on fluids and antibiotics right away. If you've never seen an infant get an IV, it's a horrible experience. Because he was just 2 1/2 months old and his veins were so tiny, they turned off the lights and used a light to shine through his skin so they could find a good vein. Unfortunately, after having me hold him down for 10 minutes and trying to place the IV, they couldn't find his vein. He ended up bleeding all over the bed and they brought in another nurse to try and place it. It took another 5 minutes of him screaming and me holding him down before they got it in. Like I said, horrible...


Isn't that the saddest thing you've ever seen?

After the IV was placed, he was moved from the ER up to the pediatric wing. They gave him a tiny hospital gown and got us settled in for a long night.

The antibiotics started working pretty quickly. By the next morning he had regained some of his color and was in a better mood. He had lost his voice during the night so he had the most pathetic cry...it just broke your heart to hear it. They closed the pediatric ward for the weekend due to low population, so he was then moved to the adult ICU for the rest of the weekend. 


Doesn't he look cute in his hospital gown? He'd been on the antibiotic for 24 hours here and was starting to feel a little better. He was even able to flirt with the nurses a bit!

When we were finally able to bring him home, he still had to be on an antibiotic and was out of daycare for a while to give his immune system a chance to build back up again. He's just now starting to regain his appetite now, more than a week later. He lost a pound while he was in the hospital too. 

A week later, he has regained his voice and his appetite is picking up. He wants to eat every 2 hours again, making up for the lost calories! His trip made the last week in January a crappy one...we were more than ready for February to arrive!

Homemade Laundry Supplies Experiment

As usual, in my quest to find ways to cut corners (ie; expenses) I've been researching ways to save when it comes to our laundry supplies. I've been reading about several different recipes and Pinterest once again came through for me and provided me with an entire page dedicated to DIY cleaning supplies.

Currently I'm using Purex Baby detergent. With Sawyer still under a year old and my own sensitivity to scents, it's a perfect detergent for us. Plus it averages $2.94 a bottle for a 32 load bottle. Imagine my dismay when we went grocery shopping on Friday and I was unable to find it at our local Meijer! (I REFUSE to buy Dreft...there's no way I'm paying over $15 for laundry detergent!) They seem to have replaced it with a Meijer brand "all natural" dtergent. And the price was raised to over $5.00 a bottle.  Now seems like the perfect time to make some changes in my laundry routine!

The first recipe I'll be trying is for DIY fabric softener. I'm starting with this one because I happen to have all the ingredients on hand already and I still have some questions I want to ask about the homemade detergent. The recipe follows:

Homemade Fabric Softener

6 c. water
3 c. white vinegar
2 c. suave hair conditioner (one blog I read suggested using whatever conditioner you had on hand, I actually do have suave)

-Warm vinegar and conditioner in the microwave
-Mix in water
-stir to combine (don not shake--too foamy!)
-Put in squirt bottle
-Spritz on old washcloth and toss in dryer with a load!

That's it! So simple! The blog where I found this recipe said she'd been using this batch for 8-10 months and she still had a ton left over! Think of the savings! I think I will cut the recipe in half to start...I'm running low on vinegar.

The next recipe is one I've already started using and simply put, it is AH-MA-ZING! I have hard water and it tends to leave those white rings in the bathroom sink. I also hate using harsh cleansers in the bathtub where I bathe the boys. I always worry about their sensitive skin. It's listed as a bathroom cleaner, but I've also used in my kitchen with great success!

DIY  Bathroom Cleaner

12 oz. Dawn dish detergent
12 oz. white vinegar

-warm the vinegar in the microwave
-combine with Dawn
-put in squirt bottle!

(A few tips--a little bit goes a LONG way. It gets soapy if you use too much! Every blog I read about this recipe stated using Dawn. I don't know if any other dish soap will work or not)
Like I said, this stuff really floats my boat! I have a white porcelin kitchen sink that tends to stain on the side that has the garbage disposal. Often times it took massive amounts of scrubbing to get the stains out. I sprayed this stuff on, let it sit for 15 minutes while I fed the baby, and ta-da! No stains! Call me crazy, but it also seems to be resisting new stains in that sink...but I might just be crazy. :o) I also used it to clean my fridge  shelves and it took out all the nasty gunk that had built up. The vinegar also helped deodorize the fridge. Spic and Span!

I have recipes for homemade laundry detergent and oxi-clean as well, but still want to do a little research before I make them. Plus, I need a shopping trip to pick up some supplies. I'm looking forward to seeing how much I can save making my own supplies!

Monday, January 2, 2012

21 Day organizing challenge, Pt. 3

Today's post focuses on our Coat area (I don't have a coat closet), under the kitchen sink, the basement stairwell and a cabinet in my kitchen that is just a mishmash of junk.

The area where we hang our coats is in my kitchen by the back door. It's a hot spot for us because we don't have a closet to hang stuff, so it becomes a dropping point for everything that comes in the back door.


Coat Area-Before


Back of Basement door-Before


Basement Stairwell-Before


Coat Area-After
I moved my coats to the back of the basement door, reserving this area for the boys coats. I hung hooks for Riley's coats and bags so he is responsible for hanging up his stuff when he comes home. I also hang his bags that we use to hold toys, etc. when we go out.


 Basement stairwell-After
I took everything out of here except for brooms, mops, etc. and reusable bags. (now maybe I'll use them???) This is seriously the cleanest this area has been since we moved in!


Under kitchen sink-Before
Whew! What a jumble!


Under kitchen sink-After
I added a little shelf to hold bottles in the back, reorganized my tote of cleaning supplies and added a basket for the light bulbs we had in there. (Look, I see some spare space...what can I shove in there?!?!)


I also added a little holder for extra sponges, etc.


Misc. Cabinet-Before
This cabinet in the corner of my kitchen holds a lot of misc. crap-extra plastic ware (plates, utensils, etc.), babyfood making equipment, cookie cutters, as well as the random coolers I have for transporting bottles. (Plus a giant-ass can of peanuts that we've had for months and only eaten like a handful out of...I think it may end up in the trash!) **Notice, though, I'm upcycling old formula containers from when Riley was a baby to hold plastic spoons and forks on the top shelf! I saved almost every can we used and stored them in the basement. They are AWESOME for storing stuff! I've even covered them and used them as gift tins for cookies!


Misc. cabinet-After!
I pulled everything out, labeled everything that was going back in and relocated just a few things. The top shelf is seasonal items: cookie cutters, can koozies and corn holders. Middle shelf is baby items: magic bullet, ricer, bottle bags and extra ice cube trays for freezing homemade baby food. Bottom shelf is paper products: paper plates, cups and silverware.


See? I told you they were handy! Wait until you see the next pictures!


This is the cabinet above my microwave. Mostly dead space because I can barely reach it and it's an odd shape, making storing anything there difficult. Usually it only holds plastic grocery bags. Of which I had WAY too many...wait for it...


Do you see where I'm going with this??

Ta Da!!!! Instant grocery bag storage!
 Each can holds about 20 bags, the rest are going to preschool!


By the way, this is what my kitchen looks like when 
I start to organize. It looks like it vomited on itself...

Here's that cabinet after I finished. It only holds 3 things; 2 cans of bags and the straw holder.


I'm counting these extra cabinets as my "You Pick" day. So I've got 6 days of maternity leave left and I've still got the pantry, laundry, freezer, spice cabinet, medicine/vitamin storage, fridge, basement, keepsakes and master closet to accomplish. Yikes, I better get my butt in gear!


Momma goals for 2012

As 2011 came to a close and we ushered in 2012 (quietly with some champagne and the 8th Harry Potter movie) it got me thinking about what my resolutions for the new year would be. I'm notoriously bad at keeping any resolutions I set for myself. They just never work out. But there were definetly some "goals" I was interested in setting for my family instead.

Here are my goals for 2012:

1. Scrapbook 1 page a week. I haven't scrapped anything since Riley's birthday, 7 months ago! With the recent birth of Sawyer as well, I want to make sure I keep up with the boys' books as much as possible. Riley loves looking back at his scrapbooks (he has 5 completes ones already!) and I need to start Sawyer's before he graduates high school. 1 page a week shouldn't be too complicated!

2. Get crafty with the boys once a week. I made Riley an art box last year for Christmas and we don't use it nearly enough! The sensory benefits they receive from playing and creating is so important to their development. Maybe Saturday mornings can be Art Day!

3. Utilize our Zoo Pass as much as possible. We received a Toledo Zoo pass for Christmas and I look forward to hitting up the zoo this year as much as possible. It also get's us into other local zoos, so travel is in our future!

4. Set up a weekly menu plan. This one is on the list because once I start back to work, we will be getting home a lot later than before and we'll be eating later in the evening, closer to Riley's bedtime. I work until 5:30 and once we load up and head home (adding in a hour of travel time if the weather is bad) we won't be eating until at least 6:30 and Riley's bedtime is 7:30! So if I have everything planned out for the week, I know what I need to defrost or my husband knows what to start before we get home and we're not scrambling to get dinner on the table when I get home.

5. PRINT PICTURES AS OFTEN AS POSSIBLE! I am HORRIBLE at getting pictures printed off. Usually I wait until I've got hundreds of pictures to print. This year, tying into my scrapbooking goal, I want to keep up with the printing so I always have pictures ready to go. I am way behind...Riley's birthday in May to be exact. But my goal is to print some every paycheck.


What are your Mommy Goals for 2012?

Thursday, December 29, 2011

21 day Organizing Challenge, Part 2

I've heard from some of you that you've started the challenge and are making progress! Keep up the good work! Christmas put me behind on posting, so this one will cram everything into one quick hit of what I've been working on. I found that I wasn't so interested in following the plan day by day, instead I found myself skipping around through the list as inspiration struck me.


DAY 2-DESK/SCRAPBOOKING AREA
This is STILL a work in progress! I can't seem to find a way that I'm totally happy with the set-up and I haven't had time to do any actual scrapbooking on it to see if it's functional yet. Still thinking...


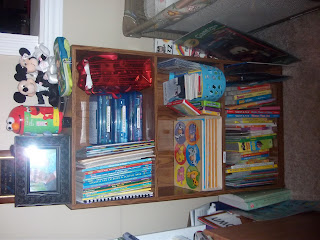
DAY 3-TOY ORGANIZATION
I don't keep toys in Riley's room, he'd never sleep. Ever. So the toys have been relegated to our office and the living room. Just imagine the number of legos Phil and I have stepped on!


I forgot to take "before" pictures of these spaces because we took down the Christmas tree that day too. I just organized the space as I packed away stuff!


 DAY 4-MEDICINE CABINET
Before...

 After! (seriously, someone needs to tell me how to rotate pictures on here...)
By the way, my shelves in the medicine cabinet were GROSS! Trust me, go check yours out...you just might vomit in your mouth a little.


 DAY 5- LINEN CLOSET
I had already done a good amount of organizing on this when I was on maternity leave with Riley. It mainly just needed some upkeep.
Before...

After!


DAY 6- UNDER BATHROOM SINK
Before...


 After...

An extra drawer shot just for fun...all clean!

As we prepare for the New Year, I am inspired to continue working on parts of the house, possibly a room a month? January is National Organization Month after all! I've looked into the 365 day plans, but for me, one task a day is too much for an entire year. I see myself missing a day and then falling farther and farther behind until I just give up and quit the plan. In my mind, I'm thinking of splitting up the year into months and having one room a month. That way I can tackle tasks at my own pace (aka, around naps, potty training and washing bottles!) I'll ponder this a little further and see what I come up with. 

If you're following the 21 day plan, post some pics so I can see them!! Keep up the great work people!

Thursday, December 22, 2011

21 Day Organizing Challenge

7 weeks of maternity leave have come and gone and I've learned something...THE CLUTTER HAS GOT TO GO! I go back to work in 20 days, and the thought of juggling two kids, a full time job and a husband with a job that requires him to be gone in the evening a lot, made me realize I need to streamline some things. I was recently browsing through Pinterest (my new obsession) and came across a blog that featured a 21 day challenge to whip things into shape. The blog is A bowl full of lemons and I fell in love immediately! The challenge requires you to address one hot spot in your home daily. They are small areas of your home, but when you add them up, it makes a huge difference in the look and feel of the space. I started 2 days ago (I had to skip a day due to holiday travel, so today I'm addressing two spots) but already I can feel a little (a tiny, little) bit of weight off my shoulders. Below are the challenges, with some editing on my part because either I don't have the spot mentioned, or it's a shared spot between my husband and I and would require a little more work on both of our parts. My final goal with this challenge, since I haven't been working, is to not have to buy a ton of new storage. I'm looking to reuse/repurpose/upcycle anything I can, making my budget virtually unnecessary!

21 day Organizing Challenge: (areas in red will be substituted)
Day 1: Junk Drawer
Day 2:  Computer Desk (I will be working on my desk/scrapbooking area)
Day 3: Tupperware drawer
Day 4: linen closet
Day 5: under kitchen sink
Day 6: dresser drawers
Day 7: pantry (I don't have a pantry per say, so will tackle my lazy susan cabinet where I store dry goods)
Day 8: Coat closet (again, no coat closet, will hit basement stairwell and coat hooks where we store those items)
Day 9: Toy organization ( work on Riley's art area in our office)
day 10: Laundry area
Day 11: Freezer
Day 12: Spice cabinet
Day 13: Medicine cabinet
Day 14: Under bathroom sink
Day 15: Medicine/vitamin storage
Day 16: Fridge
Day 17: Mail (instead will tackle storage in basement for extra kitchen appliances)
Day 18: Keepsakes
Day 19: Master closet
Day 20: Photos
Day 21: You pick!


I was able to knock out the junk drawer in about 30 minutes.

BEFORE:


 AFTER!

The biggest problem with the junk drawer was that it had collected 4 years worth of junk that actually had homes else wear. Once those items were relocated to their proper homes, it was actually quite easy to straighten everything out!


This is my desk/scrapbooking area. As you can 
see, it's a "work in progress"


Part 2 will reveal the organized desk and the 
tupperware drawer!

If you're interested in following the challenge with me, leave a comment below!